English
 Deutsch
 Polski
How to Control Tuya Devices Locally in Home Assistant

Management Summary
LocalTuya connects compatible smart-home devices directly to Home Assistant, a system that brings household controls together. Commands then travel through the home network instead of relying on an online service for every action. This can reduce dependence on the manufacturer’s cloud in everyday use. The article explains where this approach fits and why device compatibility matters: initial setup, updates and behaviour without internet access still depend on the particular device.
Contents
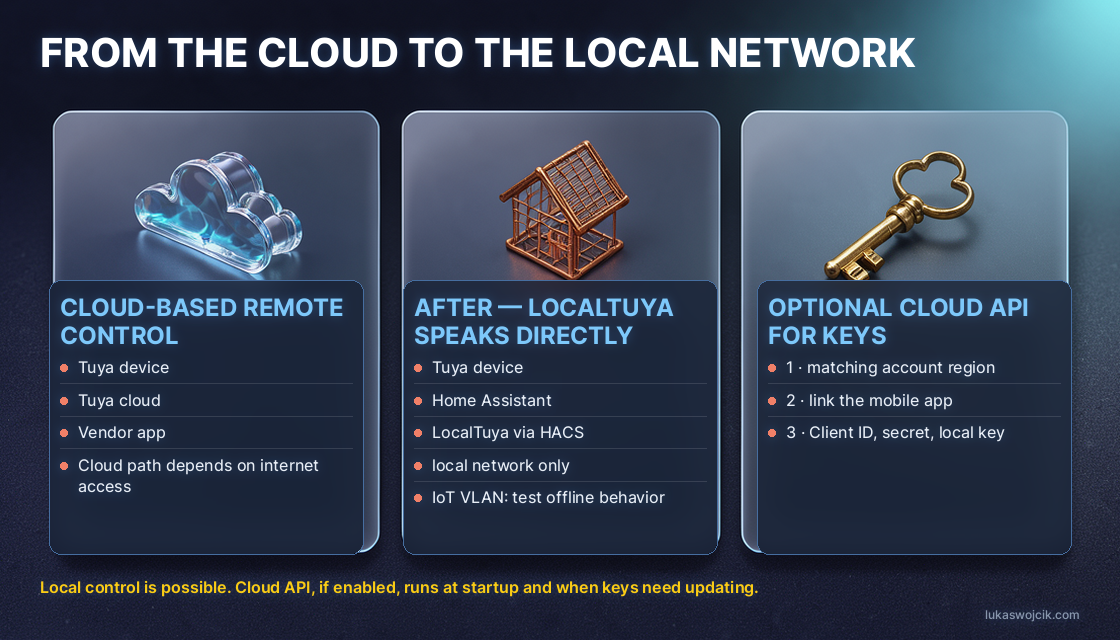
LocalTuya can control compatible Tuya devices directly from Home Assistant over the local network. This reduces dependence on the cloud for everyday commands. Compatibility, initial key retrieval and operation without internet access are separate questions.
This guide refers to the rospogrigio/localtuya project, a custom integration. The built-in Home Assistant Tuya integration is a different, cloud-based integration. A Raspberry Pi 4 is one possible host, not a requirement.
Preparation: device, backup and integration version
HACS, the Home Assistant Community Store, installs and updates community integrations that are not built into Home Assistant. A working Home Assistant installation, a backup and a compatible LocalTuya release form the starting point. HACS can install the custom integration. The project’s documentation specifies supported protocols and device categories; the Tuya logo alone does not establish compatibility. A gateway-connected or battery-powered device needs a separate compatibility check.
A DHCP reservation tells the router to give the same device the same local IP address. For a device entry, the device ID, current local key, reachable address and matching protocol are needed. The local key is a credential and belongs in protected configuration and backups.
Optional cloud project for key retrieval
The cloud API is the interface through which LocalTuya requests information from Tuya’s servers. Existing keys can be entered manually. Cloud API configuration is optional; when enabled, LocalTuya uses it at startup and when a key update is needed. It is not a one-time connection.
For that route, the Tuya developer platform needs a suitable Smart Home project linked to the app account. The project’s data center must match the account’s region, not simply the geographically nearest server. Devices should appear in the project after QR linking from Tuya Smart or Smart Life.
The project overview provides the Client ID and Secret; the linked-app section provides the User ID. API permissions and current subscription or trial conditions need checking in the account. Free account creation is not a promise of permanently unlimited API service. Secrets should remain out of screenshots, public diagnostics and ordinary shared notes.
Install, configure and map one device first
After installation through HACS and the required Home Assistant restart, LocalTuya is added through Settings → Devices & services. Menu labels vary by release. Cloud configuration can be skipped when the necessary device credentials are already available.
A VLAN is a logically separate network; discovery broadcasts may remain inside that network. Manual entry of the address and credentials is then useful, provided routing and firewall permissions allow the local connection. Closing the mobile Tuya app during setup can avoid competing connections.
In Home Assistant, an entity is an individual controllable function or reported value, such as a switch or temperature reading. A data point (DP) is a numbered device function or value. The mapping must match the exact device: DP 1 and DP 2 are not universal definitions of power and brightness. Switching, state feedback, brightness limits and sensor units need checks before adding automations. One successful command does not validate every entity.
Isolation is a separate test
A VLAN organizes the network; firewall rules enforce access restrictions. Home Assistant needs the intended local path to the device. An internet block should be tested on one device first, including a power cycle and a Home Assistant restart.
The LocalTuya project warns about some devices becoming unresponsive when internet access is blocked and about DNS behavior in such setups. Device-specific configuration may be needed. A blanket WAN rule alone is therefore not evidence of reliable offline operation or complete privacy.
Firmware is the software running inside the Tuya device itself. Cloud-delivered firmware updates also need a maintenance plan. A controlled temporary exception can allow an update, followed by local testing and restoration of the restriction. Isolation does not replace security fixes.
Questions and answers
Can re-pairing change the local key?
Yes. A new pairing can require a new key. Device credentials and the local connection need checking after pairing or maintenance.
Does local switching prove full cloud independence?
No. Key retrieval, firmware maintenance and device behavior after restarts remain separate checks. The required everyday functions should work during a deliberate internet-outage test.
Related articles